Deploying Citrix NetScaler VPX on Nutanix AHV combines the robust application delivery and load-balancing capabilities of NetScaler with the simplicity and scalability of Nutanix’s hyper-converged infrastructure. Whether you’re optimizing application performance, securing data, or streamlining network operations, this integration offers a powerful solution for modern IT environments.
In this guide, we’ll walk you through the entire process, from preparing the Nutanix environment to configuring the NetScaler VPX virtual machine and enabling console access. With clear, step-by-step instructions, you’ll be ready to leverage the full potential of these two technologies in no time.
Running NetScaler on Nutanix’s Acropolis Hypervisor (AHV) offers several advantages over traditional VMware environments:
Benefits:
See more at Nutanix.
Simplified Management and Operations
Nutanix provides a unified management interface, Prism, which consolidates control of compute, storage, and networking resources. This integration streamlines operations, reducing the complexity often associated with managing separate components in VMware environments.
Cost Efficiency
Nutanix AHV is included with the platform at no additional licensing cost, eliminating the need for separate hypervisor licenses required by VMware. This results in significant savings, especially for large-scale deployments.
Enhanced Performance
The Nutanix Distributed Storage Fabric (DSF) ensures data locality, meaning data is processed close to where it’s generated. This reduces latency and enhances performance for applications like NetScaler.
Scalability
Nutanix’s hyperconverged infrastructure allows for linear scalability. Adding or removing nodes can be done seamlessly, enabling the environment to grow with organizational needs without the complexities associated with traditional SAN-based architectures.
Integrated Security
Nutanix Flow provides micro segmentation and advanced networking security features, offering enhanced protection for applications running on the platform. This integrated approach simplifies security management compared to VMware environments that may require additional solutions.
Simplified Migration
Tools like Nutanix Move facilitate the migration of workloads from VMware to Nutanix AHV, ensuring a smooth transition with minimal downtime.
Deployment:
Deploying a NetScaler VPX on Nutanix AHV involves several key steps, including preparing the environment, configuring the virtual machine (VM), and setting up the serial port for console access.
Step 1: Preparing the Environment
Before you begin, ensure you have:
- A Nutanix cluster running AHV (Acropolis Hypervisor).
- NetScaler VPX image in
.xvaor.qcow2format (downloadable from Citrix). - Access to the Nutanix Prism interface.
- Access to Nutanix CVM.
Download the NetScaler VPX for KVM
- Visit the Citrix Downloads page.
- Navigate to the NetScaler VPX section and download the KVM build, which is typically provided as a
.tgzarchive.
Extract the Disk Image
- Use a tool like 7-Zip to extract the
.tgzfile. - Inside, locate the
.qcow2disk image file (e.g.,NSVPX-KVM-14.1-34.42_nc.qcow2).

Step 2: Upload the Disk Image to Nutanix AHV
Access Nutanix Prism
- Log in to your Nutanix Prism interface.
Upload the Image
- Navigate to Image Configuration.

- Click on Upload Image.

- Provide a name for the image (e.g., “NetScaler VPX”).
- Set the image type to Disk.
- Choose the storage container where you want the NetScaler VPX disk to reside.
- Upload the extracted
.qcow2file.

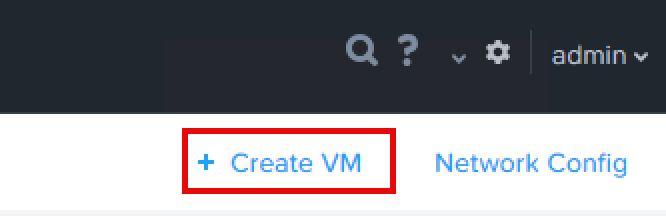
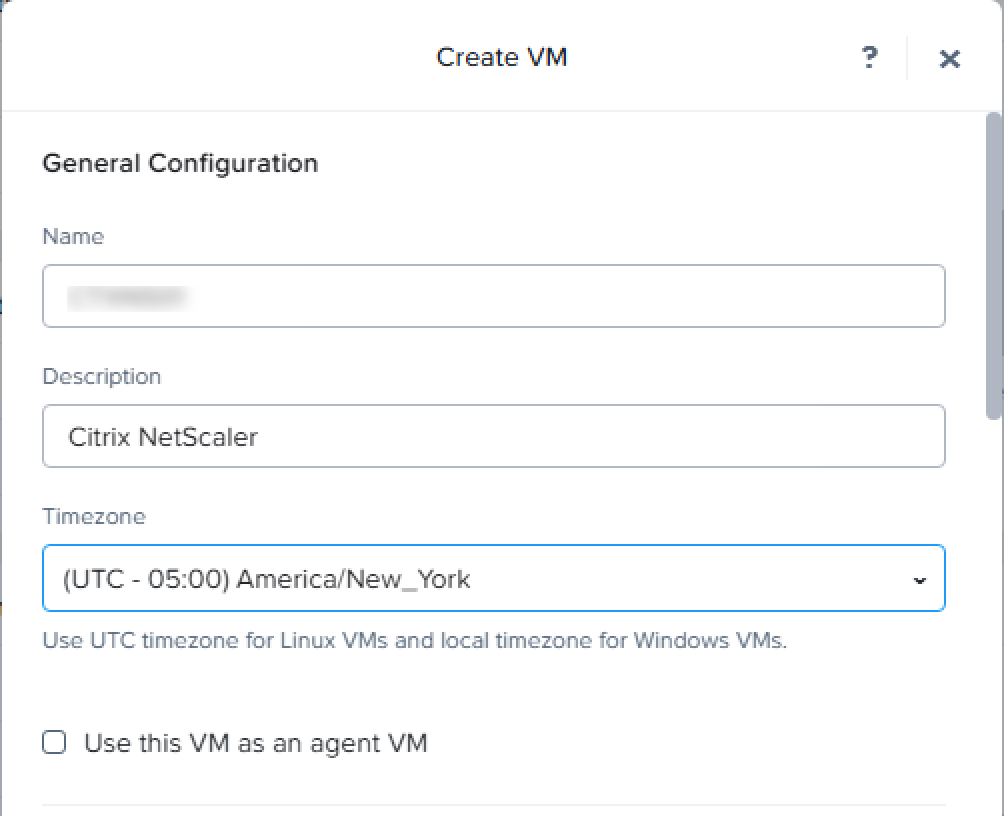
Step 3: Create the NetScaler VPX VM
Configure the VM
- In Prism, go to the VM section and click on Create VM.

- Enter a name for the VM (e.g., “NetScaler VPX”).
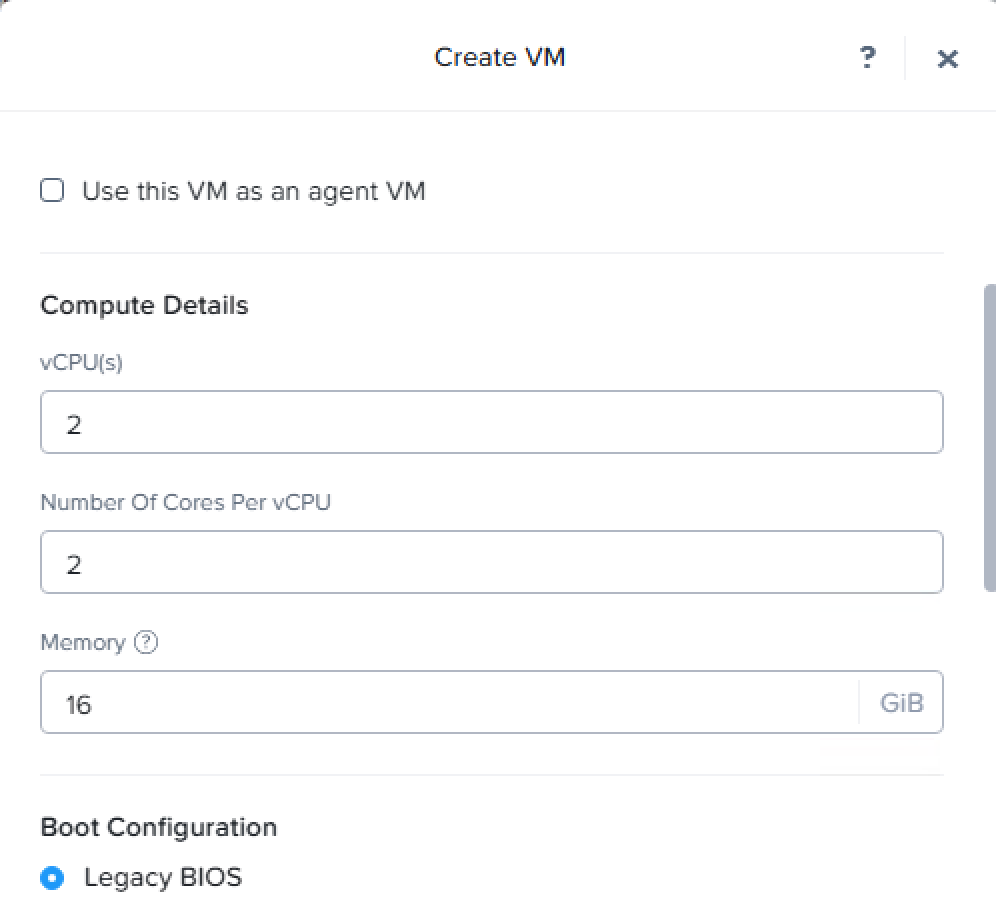
- Allocate resources:
- vCPUs: At least 2
- Memory: At least 8 GB
- In the Disks section:
- Remove the default CD-ROM to ensure the boot disk is assigned to IDE 0.
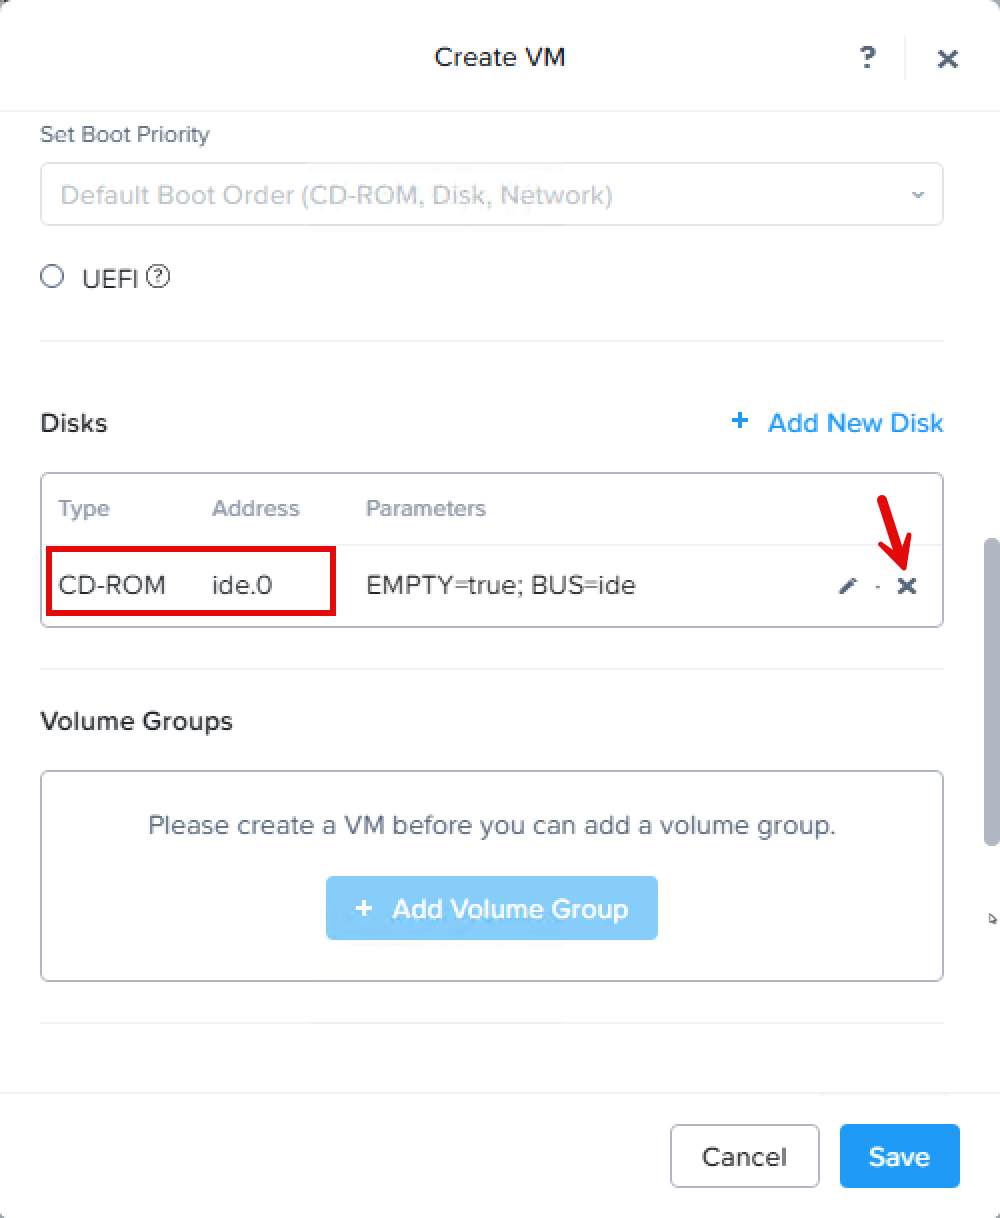
- Add a new disk:
- Type: Disk
- Operation: Clone from Image Service
- Image: Select the uploaded NetScaler VPX image
- Bus Type: IDE

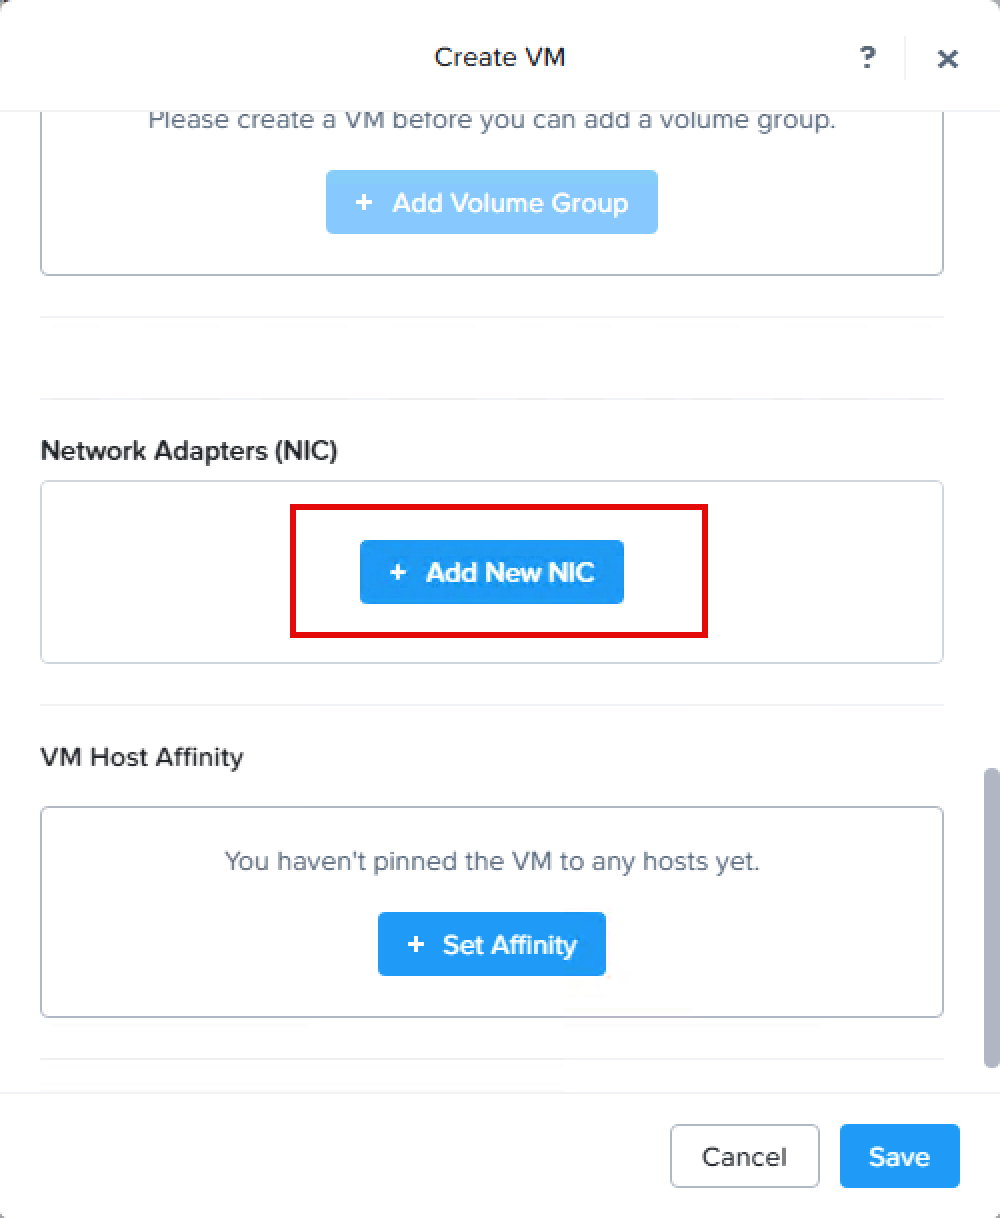
- In the Network Adapters section:
- Add a network adapter connected to the desired VLAN.

Step 4: Add a Serial Port for Console Access
To enable console access, add a serial port to the VM using the Nutanix Command Line Interface (CLI):
Access Nutanix CVM
- SSH into the Nutanix Controller VM (CVM) using an SSH client.
Add the Serial Port
- Execute the following command, replacing
<VM Name>with the name of your NetScaler VPX VM:
acli vm.serial_port_create "<VM Name>" type=kServer index=0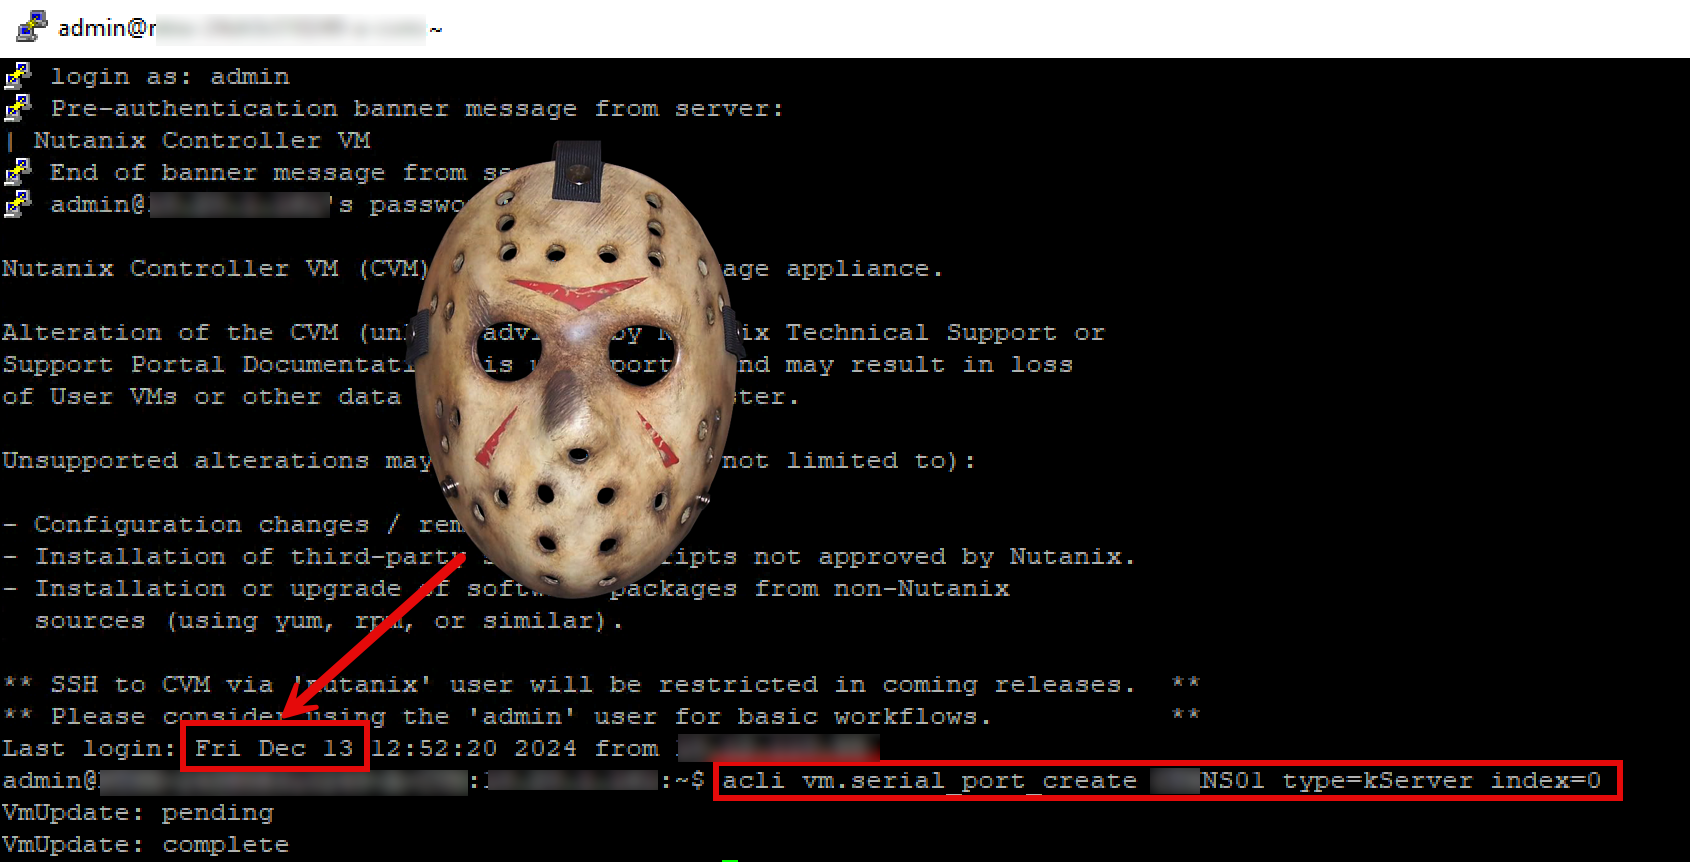
Step 5: Power On and Configure the NetScaler VPX
Start the VM
- In Prism, locate your NetScaler VPX VM.
- Power on the VM.
Initial Configuration
- Access the VM’s console via Prism or through the serial port.
- Log in using the default credentials:
- Username:
nsroot - Password:
nsroot
- Username:
- Log in using the default credentials:
- Configure the NetScaler IP (NSIP) and subnet mask by entering
config ns- If your management station is on a different subnet, set the default gateway:
add route 0.0.0.0 0.0.0.0 <Gateway IP>- Save the configuration:
save ns config- Reboot the NetScaler:
rebootStep 6: Access the NetScaler Management Interface
- After the reboot, open a web browser and navigate to the NetScaler IP address.
- Log in with the
nsrootcredentials. - Proceed with any additional configurations as needed.
Deploying Citrix NetScaler VPX on Nutanix AHV is more than just a technical integration it’s a strategic choice for modern IT environments.
By leveraging the simplicity and scalability of Nutanix’s hyper-converged infrastructure alongside the robust application delivery and security features of NetScaler, organizations can achieve unparalleled performance, reduced operational complexity, and enhanced reliability.


You must be logged in to post a comment.