Here are my StoreFront customizations for Citrix StoreFront 2.6. Many are similar to previous version of SF, however some of the syntax changed.
There are some good improvements/features SF 2.6 brings, one that I like and works best where I currently work is the Web Folder View, which in the past had to be done by running StoreFront in lock down mode. This new view can certainly help your users feel more comfortable when moving from Web Interface.
Fist take a look at the new features of StoreFront which are listed under this link from Citrix.
Secondly I would like to thank Sam Jacobs which provided some of his code he presented at Citrix Synergy 2014. You can view the presentation here
Environment:
- Windows 2008 R2
- Citrix XenApp 6.5 Hotfix Rollup Pack 2
- PVS 6.1.16
- StoreFront 2.6
- Citrix NetScaler 10.1 build 122.17
Customizations: (All custom files will need to be created under the contrib folder is located under the SF site in the file system (typical location is C:inetpubwwwrootsitesCitrixStoreWebNamecontrib
The following customizations include the following
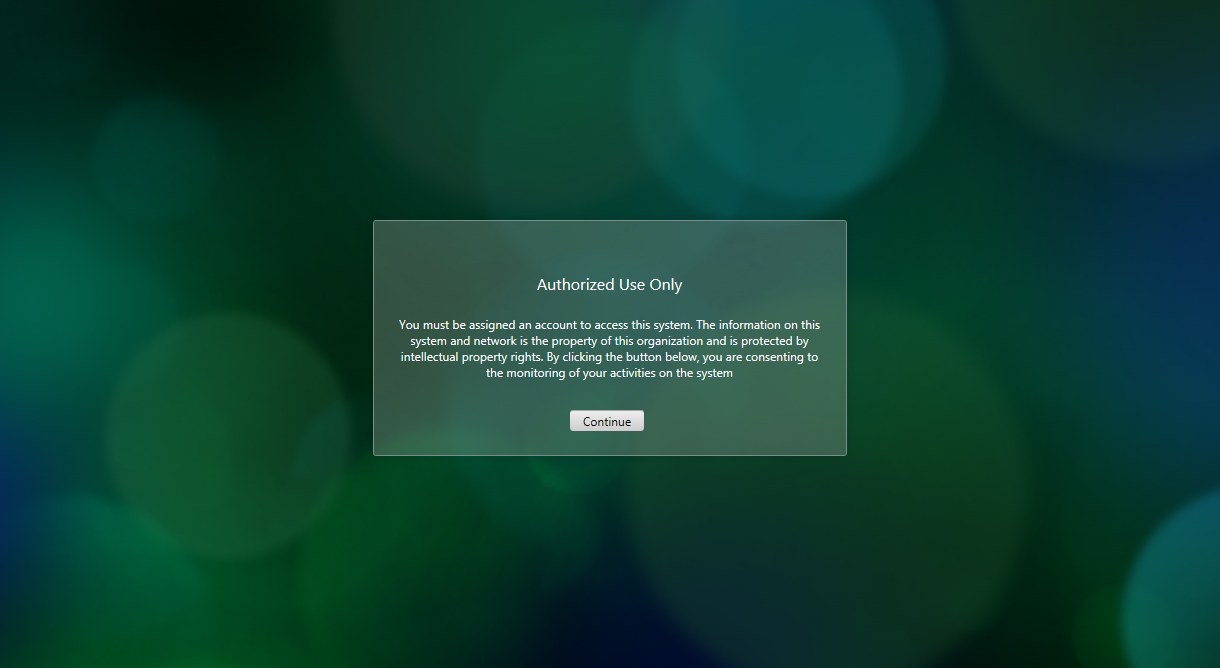
- Pre-Login message page
- Front Page with custom logo and title header
- App/Desktop page with custom logo, user client IP (For NetScaler load balancing make sure to use X-Forwarded-For to load balance your StoreFront servers, utilizing CLIENT-IP for your VIP will return the SNIP of your NetScaler as the source IP for the user client IP module :P)
- Apps/Desktop Tab on top with Disable user multiclick
- Page footer
![]()
![]()
Back up the original files under C:inetpubwwwrootsitesCitrixStoreWebNamecontrib
Steps:
1. Overwrite the following files
- custom.wrstrings.en.js
- custom.script.js
- custom.style.css
2. Create new files
- GetServerData.aspx
- companylogo_whiteTrans.png
- companylogo_whitetrans_small.png
Code:
custom.wrstrings.en.js
(function ($) {
$.localization.customStringBundle(‘en’, {
Disclaimer: ‘Authorized Use Only’,
DisclaimerStatement: ‘You must be assigned an account to access this system.’
+ ‘ The information on this system and network is the property of this organization and is protected by intellectual property rights.’
+ ‘ By clicking the button below, you are consenting to the monitoring of your activities on the system’,
Continue: ‘Continue’
});
})(jQuery);
custom.script.js (You can certainly change the way I am working with $(document).ready(function() { and clean it up a bit
// StoreFront customizations
// Replace title
document.title = ‘Remote Access’;// Place Apps/Desktop Tab on top
$(document).ready(function() {
$(“#resources-switcher” ).detach().appendTo(“#resources-header” );
});// Disable User Multi Click 😛
$(document).ready(function() {
CTXS.Resources.multiClickTimeout = 10;
});// Display client IP and StoreFront server
$.ajax({
url: ‘contrib/GetServerData.aspx?serverData=clientIPandServerName’,
success: function(data) {
var $markup = $(‘<div id=”server-info”>’ + data + ‘</div>’);
$markup.insertBefore(‘#header-userinfo’);
}
});// Logon page footer text
// $(document).ready(function() {
// var $footercontent = $(‘<div id=”authentication-footer”><div id=”authentication-copyrightfooter”> <p id=”authentication-copyrightFooterText”></p></div></div>’);
// $footercontent.insertAfter(‘#logonbelt-bottomshadow’);
// });// $(document).ready(function() {
// $(‘#authentication-copyrightfooter’)[0].innerHTML =
// ‘<p>©2014 Access restricted to authorized users.</p>’;
// });// application page footer text
$(document).ready(function() {
$(‘#copyrightfooter’)[0].innerHTML = ‘<p>©2014 Name of your company</p>’;
});// Prelogin page
$(document).ready(function() {
CTXS.Application.preLoginHook = function () {
var _dialogTitle = ‘<h1’
+ ‘ class=”messagebox-title _ctxstxt_Disclaimer”></h1>’;
var _dialogBody = ‘<div class=”messagebox-body”>’ +
‘<p class=”_ctxstxt_DisclaimerStatement”></p></div>’;
var _dialogButton = ‘<div class=”messagebox-buttons”>’ +
‘<a href=”#” class=”button _ctxstxt_Continue”></a></div>’;
var dialog = _dialogTitle + _dialogBody + _dialogButton;
var $messagePane = CTXS.displayMessagePane(dialog).ctxsLocalize();
var $button = $messagePane.find(‘.button’);
$button.click(function () {
CTXS.Events.publish(CTXS.Events.preLogin.done);
return false;
}).ctxsHandleEscapeKeyInDialog().ctxsPlaceFocusOnFirstElement(
).ctxsBindFocusWithin();
};
});
custom.style.css
/*
StoreFront customizations
*/#credentialupdate-logonimage, #logonbox-logoimage {
background-image: url(“companylogo_whiteTrans.png”);
height: 50px;
width: 283px;
}#header-logo {
background-image: url(“companylogo_whitetrans_small.png”);
height: 31px;
margin: 8px 0 0 22px;
width: 179px;
}#resources-header {
height: 84px;
}#resources-switcher {
padding-top: 48px;
text-align: center;
}/* Help Desk info */
/* Logon labels */
#logonbox-logonform label{
color:white;
display:table-cell;
font-size:14px;
height:20px;
vertical-align:bottom;
}/* welcome message and username */
#resources-header #header-userinfo {
float:left;
margin-top:12px;
margin-right:100px;
vertical-align:middle;
color:white;
}#header-username,
#header-userinfo A {
color:white;
font-size:12px;
}/* for added server info */
#server-info {
color: white;
font-size:12px;
float: left;
margin-right: 40px;
margin-top: 12px;
position: relative;
vertical-align: middle;
}/* EOF Help Desk info */
/* Logon page footer text
#copyrightfooter p,
#copyrightfooter a,
#authentication-copyrightfooter p,
#authentication-copyrightfooter a
{color:white;}*/
/* turn off searchbox
#resources-searcharea {
display: none;
}
*/
GetServerData.aspx
<%@ Page Language=”C#” %>
<script runat=”server” language=”C#”>
private string GetClientIP()
{
string ips = Request.ServerVariables[“HTTP_X_FORWARDED_FOR”];if (!string.IsNullOrEmpty(ips))
{
return ips.Split(‘,’)[0];
}return Request.ServerVariables[“REMOTE_ADDR”];
}private string GetServerName()
{
// for security purposes, only return the last 2 chars
string server = Environment.MachineName;
return server.Substring(server.Length-2);
}
</script><%
// what server data are we looking for?
string sData = Request[“serverData”]+””;switch (sData)
{
case “clientIP”:
Response.Write(GetClientIP());
break;case “serverName”:
Response.Write(GetServerName());
break;case “clientIPandServerName”:
Response.Write(“Client IP: ” + GetClientIP() +
“ Server: ” + GetServerName());
break;default:
break;
}
%>
Hope this helps you 🙂


Leave a comment